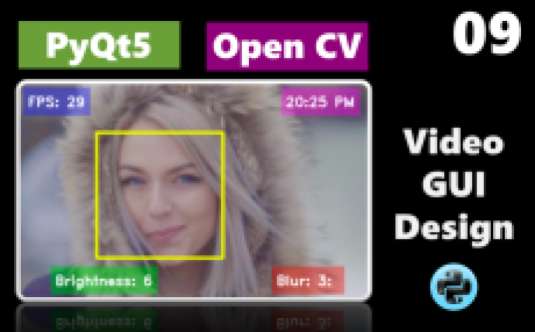
Hi and welcome! This is part 13 of the PyQt5 learning series. Previously, in Part 9 we have developed a video processing GUI. Today we will use that GUI in a more advanced level. Recently, some friends have requested to make a tutorial in which a user can tryon lipstick colors. So, in this tutorial an image, video or webcam video can be used as input and the GUI will display the face with colored lips. The color of lips will be selected from a drop down list. So lets do it!
We will proceed in several steps to finish this GUI project.
1. Structure of project directory
In the main project directory 13-Lipstick color picker GUI in PyQt5 we have:
 13-Lipstick color picker GUI in PyQt5/
├── images/
│   ├── Air Force Blue (Raf).png
│   ├── Air Force Blue (Usaf).png
│   ├── Air Superiority Blue.png
│   ├── Alabama Crimson.png
│   ├── Alice Blue.png
│   ├── Alizarin Crimson.png
│   ├── Wood Brown.png
│   ├── Xanadu.png
│   ├── Yale Blue.png
│   ├── Yellow (Munsell).png
│   ├── Yellow (Ncs).png
│   ├── Yellow (Process).png
│   ├── Yellow (Ryb).png
│   ├── Yellow Orange.png
│   ├── Yellow-Green.png
│   ├── Yellow.png
│   ├── Zaffre.png
│   └── Zinnwaldite Brown.png
├── lena.jpg
├── process.py
└── shape_predictor_68_face_landmarks.dat
-
images directory: that contains colored tiles. The center point of each color tile will be used as the input R,G,B color. Moreover, at the start, this images directory will be processed to generate the dropdown list. If you want to add more colors simply make small size solid tiles of 60x80 size in MS paint. Give this tile a name so that this name will be displayed in the dropdown list. The default images directory can be downloaded from here: https://drive.google.com/file/d/12cby1Njphwl2361tSsVA7RrmA1n-METo/view?usp=sharing
-
process.py file: that contains the main code (Available below)
-
lena.jpg file: A sample input image. Can be downloaded from here: https://drive.google.com/file/d/1BSNyxmqIjK8YKdIEmwZfK8xS8Q0dRoCb/view?usp=sharing
-
shape_predictor_68_face_landmarks.dat: A dlib trained model which will be used to detect 68 facial landmarks. We will only use the points related to lips. You download it freely from https://github.com/davisking/dlib-models/blob/master/shape_predictor_68_face_landmarks.dat.bz2
In a project directory copy above four items and to run the GUI simply use:
python process.py
We will now proceed to explain the main code so that you can understand the changes we made to the Part 9 of the PyQt5 learning series. If you have missed that part, then please go this video tutorial before reading further
Let’s begin the code details
# 2. Importing essentials
We can install them using pip install and then import them as:
from PyQt5 import QtCore, QtGui, QtWidgets
from PyQt5.QtWidgets import QFileDialog
from PyQt5.QtGui import QImage
import cv2, imutils
import time
import numpy as np
import os
import dlib
import pyshine as ps
# 3. Loading the Dlib facial landmarks detector model
detector = dlib.get_frontal_face_detector()
predictor = dlib.shape_predictor("shape_predictor_68_face_landmarks.dat")
Here we have the detector to detect face and a predictor to predict the facial landmarks on that detected face
# 4. Loading the images directory to generate an RGB dictionary
path ="images"
file_list=[]
file_paths = filter(os.path.isfile,[os.path.join(path,x) for x in os.listdir(path)])
RGB_dict={}
for f in file_paths:
	file_list.append( f )
	img = cv2.imread(f, cv2.IMREAD_UNCHANGED)
	h,w,c = img.shape
	h,w=h//2,w//2
	b, g, r    = img[h, w, 0], img[h,w , 1],img[h, w, 2]
	base_name = os.path.basename(f)
	base_name = os.path.splitext(base_name)[0]
	RGB_dict[base_name]  =  [r,g,b]
Here we will give the path of images and then scan this path to get all the paths of each image file in it. Based on each path we will read the the image take the shape of image img and then take the b,g,r of the center point h//2, w//2. The key to RGB_dict is the base name of that color tile image, and the value is a list [r,g,b].
# 5. Main window class
class Ui_MainWindow(object):
	def setupUi(self, MainWindow):
		MainWindow.setObjectName("MainWindow")
		MainWindow.resize(498, 522)
		...
		...
		...
## #	# Added code here
		self.filename = 'Snapshot '+str(time.strftime("%Y-%b-%d at %H.%M.%S %p"))+'.png' # Will hold the image address location
		self.tmp = None # Will hold the temporary image for display
		self.brightness_value_now = 0 # Updated brightness value
		self.blur_value_now = 0 # Updated blur value
		self.fps=0
		self.started = False
		self.lipstick_RGB=[227,38,54] # 227,38,54
		self.mode='cam'
		self.color_selected_text= 'Default'
Here after initializing the setupUi for the MainWindow just like before in Part 9 tutorial, we will take the initial lipstick color R,G,B. The self.mode is used for either ‘cam’ or ‘image’ selection. The self.color_selected_text will be used for the printing color value on the image. A user can tryon color and then press the take photo button and that saved image will have a watermark on it to show the reference color name.
# 6. Input modes functions
We have added two radio buttons to the GUI, that will take user selection either image/video or webcam as the input
def imageMode(self):
	""" This function willl select the image mode"""
	self.mode='image'
	print(self.mode)

def videoMode(self):
	""" This function willl select the video mode"""
	self.mode='cam'
	print(self.mode)
# 7. Load the input
This function will have two lists: one for the detection of video file extension, the other for the image file extension such as .jpg etc. Based on the type it will operate to provide us the input image.
def load(self):
	""" This function will load the camera device, image file or video file, obtain the image
		and set it to label using the setPhoto function
	"""
	video_file_ext = ['.MP4','.AVI']
	image_file_ext = ['.PNG','.JPG','.JPEG','.BMP','.TIFF']

	ext=None
	if self.started==False:
		if self.mode=='image':
			self.filename = QFileDialog.getOpenFileName(filter="Image or Video(mp4) (*.*)")[0]
			ext = os.path.splitext(self.filename)[1].upper()


	if self.started:
		self.started=False
		self.pushButton_2.setText('Start')
	else:
		self.started=True
		self.pushButton_2.setText('Stop')


	if self.mode=='cam':
		vid = cv2.VideoCapture(0)
	else:
		if ext in video_file_ext:
			vid = cv2.VideoCapture(self.filename)


	cnt=0
	frames_to_count=20
	st = 0
	fps=0
	self.comboBox.setEnabled(True)
	self.pushButton.setEnabled(True)
	self.radioButton.setEnabled(False)
	self.radioButton2.setEnabled(False)
	while(True):
		if self.mode == 'cam':
			_, self.image = vid.read()
		else:
			if ext in video_file_ext:
				_, self.image = vid.read()
			elif ext in image_file_ext:
				self.image = cv2.imread(self.filename,cv2.IMREAD_COLOR)


		self.update()
		key = cv2.waitKey(1) & 0xFF
		time.sleep(0.033)
		if self.started==False:
			self.radioButton.setEnabled(True)
			self.radioButton2.setEnabled(True)
			break
			print('Loop break')
		QtWidgets.QApplication.processEvents()
# 8. Several functions for the User inputs
These functions are mostly similar to Part 9 tutorial. We will set photo, change brightness, blur and color values for the lips instead.
def setPhoto(self,image):
	""" This function will take image input and resize it
		only for display purpose and convert it to QImage
		to set at the label.
	"""
	self.tmp = image
	image = imutils.resize(image,height=480)
	text  =  self.color_selected_text
	rgb=self.lipstick_RGB
	image = ps.putBText(image,text,text_offset_x=10,text_offset_y=10,font_scale=0.5,background_RGB=rgb,text_RGB=(255,255,255))

	frame = cv2.cvtColor(image, cv2.COLOR_BGR2RGB)
	image = QImage(frame, frame.shape[1],frame.shape[0],frame.strides[0],QImage.Format_RGB888)
	self.label.setPixmap(QtGui.QPixmap.fromImage(image))

def brightness_value(self,value):
	""" This function will take value from the slider
		for the brightness from 0 to 99
	"""
	self.brightness_value_now = value
	print('Brightness: ',value)
	self.update()


def blur_value(self,value):
	""" This function will take value from the slider
		for the blur from 0 to 99 """
	self.blur_value_now = value
	print('Blur: ',value)
	self.update()

def lipStick_value(self,value):
	"""  This function will take the RGB color selected from dropdown list
		then update
	"""
	self.lipstick_RGB = RGB_dict[value]
	self.color_selected_text = str(value)
	self.update()
# 9. Apply the lip color
Here we will apply the color value to the input image img. Only at the lips part. We will iterate over the 68 points, take the ones belonging to lips and then mask a binary image. After that we will merge the lips color image with the input image to output the desired image. The brightness and blur values will be used to change the lipstick color weight and blur. You can experiment with this part to achieve the desired results.
def changeLipstick(self,img,value):
	""" This funciton will take img image and lipstick color RGB
		Out the image with a changed lip color of the image
	"""

	img = cv2.resize(img,(0,0),None,1,1)
	imgOriginal = img.copy()
	imgColorLips=imgOriginal
	imgGray = cv2.cvtColor(img, cv2.COLOR_BGR2GRAY)
	faces = detector(imgGray)

	for face in faces:
		x1,y1 = face.left(),face.top()
		x2,y2 = face.right(),face.bottom()

		facial_landmarks = predictor(imgGray,face)
		points =[]
		for i in range(68):
			x = facial_landmarks.part(i).x
			y = facial_landmarks.part(i).y
			points.append([x,y])


		points = np.array(points)
		imgLips = self.getMaskOfLips(img,points[48:61])

		imgColorLips = np.zeros_like(imgLips)

		imgColorLips[:] =value[2],value[1],value[0]
		imgColorLips = cv2.bitwise_and(imgLips,imgColorLips)

		value = self.blur_value_now
		value=value//10
		if value%2==0:
			value+=1
		kernel_size = (6+value,6+value) # +1 is to avoid 0

		weight = self.brightness_value_now
		weight = 0.4 + (weight)/600
		imgColorLips = cv2.GaussianBlur(imgColorLips,kernel_size,10)
		imgColorLips = cv2.addWeighted(imgOriginal,1,imgColorLips,weight,0)


	return imgColorLips

def getMaskOfLips(self,img,points):
	""" This function will input the lips points and the image
		It will return the mask of lips region containing white pixels
	"""
	mask = np.zeros_like(img)
	mask = cv2.fillPoly(mask,[points],(255,255,255))
	return mask
# 10. Save the photo
Here will save the photo and apply a watermark on it. After that we can run the main application just like before.
def savePhoto(self):
	""" This function will save the image"""
	rgb=self.lipstick_RGB
	image = self.tmp
	text  =  self.color_selected_text
	image = ps.putBText(image,text,text_offset_x=10,text_offset_y=10,font_scale=0.6,background_RGB=rgb,text_RGB=(255,255,255))
	filename = 'Snapshot '+str(time.strftime("%Y-%b-%d at %H.%M.%S %p"))+'.png'
	cv2.imwrite(filename,image)
	print('Image saved as:',filename)


def retranslateUi(self, MainWindow):
	_translate = QtCore.QCoreApplication.translate
	MainWindow.setWindowTitle(_translate("MainWindow", "PyShine video process"))
	self.pushButton_2.setText(_translate("MainWindow", "Start"))
	self.label_2.setText(_translate("MainWindow", "Brightness"))
	self.label_3.setText(_translate("MainWindow", "Blur"))
	self.pushButton.setText(_translate("MainWindow", "Take picture"))

if __name__ == "__main__":
	import sys
	app = QtWidgets.QApplication(sys.argv)
	MainWindow = QtWidgets.QMainWindow()
	ui = Ui_MainWindow()
	ui.setupUi(MainWindow)
	MainWindow.show()
	sys.exit(app.exec_())
# COMPLETE CODE
Here is complete main code:
# process.py
  ## -*- coding: utf-8 -*-

## # Form implementation generated from reading ui file 'process.ui'
##
## # Created by: PyQt5 UI code generator 5.11.3
##
## # WARNING! All changes made in this file will be lost!
##
## # Subscribe to PyShine Youtube channel for more detail!
## #
## # This code will let user to input 1) image 2) video 3) webcam and apply lip color
##
## # Essentials can be installed through pip install: dlib, cv2, PyQt5, numpy, imutils, pyshine
##
## # Usage: python process.py

from PyQt5 import QtCore, QtGui, QtWidgets
from PyQt5.QtWidgets import QFileDialog, QColorDialog
from PyQt5.QtGui import QImage
import cv2, imutils
import time
import numpy as np
import os
import dlib
import pyshine as ps
detector = dlib.get_frontal_face_detector()
predictor = dlib.shape_predictor("shape_predictor_68_face_landmarks.dat")

path ="images"
file_list=[]
file_paths = filter(os.path.isfile,[os.path.join(path,x) for x in os.listdir(path)])
RGB_dict={}

for f in file_paths:
	file_list.append( f )
	img = cv2.imread(f, cv2.IMREAD_UNCHANGED)
	h,w,c = img.shape
	h,w=h//2,w//2
	b, g, r    = img[h, w, 0], img[h,w , 1],img[h, w, 2]
	base_name = os.path.basename(f)
	base_name = os.path.splitext(base_name)[0]
	RGB_dict[base_name]  =  [r,g,b]

class Ui_MainWindow(object):
	def setupUi(self, MainWindow):
		MainWindow.setObjectName("MainWindow")
		MainWindow.resize(498, 522)
		self.centralwidget = QtWidgets.QWidget(MainWindow)
		self.centralwidget.setObjectName("centralwidget")
		self.gridLayout_2 = QtWidgets.QGridLayout(self.centralwidget)
		self.gridLayout_2.setObjectName("gridLayout_2")
		self.horizontalLayout = QtWidgets.QHBoxLayout()
		self.horizontalLayout.setObjectName("horizontalLayout")
		self.label = QtWidgets.QLabel(self.centralwidget)
		self.label.setText("")
		self.label.setPixmap(QtGui.QPixmap("images/H.png"))
		self.label.setObjectName("label")
		self.horizontalLayout.addWidget(self.label)
		self.gridLayout = QtWidgets.QGridLayout()
		self.gridLayout.setObjectName("gridLayout")
		self.verticalSlider = QtWidgets.QSlider(self.centralwidget)
		self.verticalSlider.setOrientation(QtCore.Qt.Vertical)
		self.verticalSlider.setObjectName("verticalSlider")
		self.gridLayout.addWidget(self.verticalSlider, 0, 0, 1, 1)
		self.verticalSlider_2 = QtWidgets.QSlider(self.centralwidget)
		self.verticalSlider_2.setOrientation(QtCore.Qt.Vertical)
		self.verticalSlider_2.setObjectName("verticalSlider_2")
		self.gridLayout.addWidget(self.verticalSlider_2, 0, 1, 1, 1)
		self.label_2 = QtWidgets.QLabel(self.centralwidget)
		self.label_2.setAlignment(QtCore.Qt.AlignCenter)
		self.label_2.setObjectName("label_2")
		self.gridLayout.addWidget(self.label_2, 1, 0, 1, 1)
		self.label_3 = QtWidgets.QLabel(self.centralwidget)
		self.label_3.setAlignment(QtCore.Qt.AlignCenter)
		self.label_3.setObjectName("label_3")
		self.gridLayout.addWidget(self.label_3, 1, 1, 1, 1)
		self.horizontalLayout.addLayout(self.gridLayout)
		self.gridLayout_2.addLayout(self.horizontalLayout, 0, 0, 1, 2)
		self.horizontalLayout_2 = QtWidgets.QHBoxLayout()
		self.horizontalLayout_2.setObjectName("horizontalLayout_2")
		self.pushButton = QtWidgets.QPushButton(self.centralwidget)
		self.pushButton.setObjectName("pushButton")


		self.comboBox = QtWidgets.QComboBox(self.centralwidget)
		self.comboBox.setObjectName("comboBox")

		for k,v in RGB_dict.items():
			icon = QtGui.QIcon()
			icon.addPixmap(QtGui.QPixmap(f'images/{k}.png'), QtGui.QIcon.Normal, QtGui.QIcon.On)
			self.comboBox.addItem(icon,k)

		self.horizontalLayout_2.addWidget(self.comboBox)
		self.horizontalLayout_2.addWidget(self.pushButton)
		self.pushButton_2 = QtWidgets.QPushButton(self.centralwidget)
		self.pushButton_2.setObjectName("pushButton_2")
		self.pushButton_3 = QtWidgets.QPushButton(self.centralwidget)
		self.pushButton_3.setObjectName("pushButton_3")

		self.radioButton = QtWidgets.QRadioButton(self.centralwidget)
		self.radioButton.setObjectName("radioButton")
		self.radioButton2 = QtWidgets.QRadioButton(self.centralwidget)
		self.radioButton2.setObjectName("radioButton2")
		self.radioButton.setText("Image/Video")
		self.radioButton2.setText("Web Camera")

		self.horizontalLayout_2.addWidget(self.pushButton_3)
		self.horizontalLayout_2.addWidget(self.pushButton_2)
		self.horizontalLayout_2.addWidget(self.radioButton)
		self.horizontalLayout_2.addWidget(self.radioButton2)


		self.gridLayout_2.addLayout(self.horizontalLayout_2, 1, 0, 1, 1)
		spacerItem = QtWidgets.QSpacerItem(313, 20, QtWidgets.QSizePolicy.Expanding, QtWidgets.QSizePolicy.Minimum)
		self.gridLayout_2.addItem(spacerItem, 1, 1, 1, 1)
		MainWindow.setCentralWidget(self.centralwidget)
		self.statusbar = QtWidgets.QStatusBar(MainWindow)
		self.statusbar.setObjectName("statusbar")
		MainWindow.setStatusBar(self.statusbar)


		self.comboBox.setCurrentIndex(5)
		self.comboBox.currentIndexChanged[str].connect(self.lipStick_value)
		self.comboBox.setEnabled(False)
		self.pushButton.setEnabled(False)
		self.pushButton_3.setEnabled(False)
		self.radioButton2.setChecked(True)
		self.retranslateUi(MainWindow)
		self.verticalSlider.valueChanged['int'].connect(self.brightness_value)
		self.verticalSlider_2.valueChanged['int'].connect(self.blur_value)
		self.pushButton_2.clicked.connect(self.load)
		self.pushButton_3.clicked.connect(self.colorPicker)
		self.pushButton.clicked.connect(self.savePhoto)
		self.radioButton.clicked.connect(self.imageMode)
		self.radioButton2.clicked.connect(self.videoMode)
		QtCore.QMetaObject.connectSlotsByName(MainWindow)

## #	# Added code here
		self.filename = 'Snapshot '+str(time.strftime("%Y-%b-%d at %H.%M.%S %p"))+'.png' # Will hold the image address location
		self.tmp = None # Will hold the temporary image for display
		self.brightness_value_now = 0 # Updated brightness value
		self.blur_value_now = 0 # Updated blur value
		self.fps=0
		self.started = False
		self.lipstick_RGB=[227,38,54] # 227,38,54
		self.mode='cam'
		self.color_selected_text= 'Default'
		self.readBefore = False

	def colorPicker(self):
		""" Open up the color picker dialog"""
		self.openColorDialog()

	def openColorDialog(self):
		"""  This function will open the color dialog and let user choose either from it or from anywhere in the
			screen
		"""

		color = QColorDialog.getColor()
		if color.isValid():
			print(color.getRgb())
			(R,G,B,_)=color.getRgb()
			try:
				self.lipstick_RGB = [R,G,B]
				self.color_selected_text = 'COLOR PICKED'
				self.update()
			except Exception as e:
				print(e)
				pass

	def imageMode(self):
		""" This function willl select the image mode"""
		self.mode='image'
		print(self.mode)

	def videoMode(self):
		""" This function willl select the video mode"""
		self.mode='cam'
		print(self.mode)


	def load(self):
		""" This function will load the camera device, image file or video file, obtain the image
			and set it to label using the setPhoto function
		"""
		video_file_ext = ['.MP4','.AVI']
		image_file_ext = ['.PNG','.JPG','.JPEG','.BMP','.TIFF']

		ext=None
		if self.started==False:
			if self.mode=='image':
				self.filename = QFileDialog.getOpenFileName(filter="Image or Video(mp4) (*.*)")[0]
				ext = os.path.splitext(self.filename)[1].upper()


		if self.started:
			self.started=False
			self.pushButton_2.setText('Start')
		else:
			self.started=True
			self.pushButton_2.setText('Stop')


		if self.mode=='cam':
			vid = cv2.VideoCapture(0)
		else:
			if ext in video_file_ext:
				vid = cv2.VideoCapture(self.filename)


		cnt=0
		frames_to_count=20
		st = 0
		fps=0
		self.comboBox.setEnabled(True)
		self.pushButton.setEnabled(True)
		self.pushButton_3.setEnabled(True)
		self.radioButton.setEnabled(False)
		self.radioButton2.setEnabled(False)
		while(True):
			if self.mode == 'cam':
				_, self.image = vid.read()
				self.image = imutils.resize(self.image,height=480)
			else:
				if ext in video_file_ext:
					try:
						_, self.image = vid.read()
						self.image = imutils.resize(self.image,width=480)
					except Exception as e:
						print(e)
						pass
				elif ext in image_file_ext:
					if self.readBefore == False:
						self.image = cv2.imread(self.filename,cv2.IMREAD_COLOR)
						self.image = imutils.resize(self.image,height=480)
						self.readBefore	= True

			try:
				self.update()
			except Exception as e:
				print(e)
				self.started=False
				self.pushButton_2.setText('Start')


			key = cv2.waitKey(1) & 0xFF
			time.sleep(0.01)

			if self.started==False:
				self.radioButton.setEnabled(True)
				self.radioButton2.setEnabled(True)
				self.readBefore	= False
				break
				print('Loop break')
			#QtWidgets.QApplication.processEvents()

	def setPhoto(self,image):
		""" This function will take image input and resize it
			only for display purpose and convert it to QImage
			to set at the label.
		"""
		self.tmp = image
		image = imutils.resize(image,height=480)
		text  =  self.color_selected_text
		rgb=self.lipstick_RGB
		image = ps.putBText(image,text,text_offset_x=10,text_offset_y=10,font_scale=0.5,background_RGB=rgb,text_RGB=(255,255,255))

		frame = cv2.cvtColor(image, cv2.COLOR_BGR2RGB)
		image = QImage(frame, frame.shape[1],frame.shape[0],frame.strides[0],QImage.Format_RGB888)
		self.label.setPixmap(QtGui.QPixmap.fromImage(image))

	def brightness_value(self,value):
		""" This function will take value from the slider
			for the brightness from 0 to 99
		"""
		try:
			self.brightness_value_now = value
			self.update()
		except Exception as e:
			print(e)
			pass


	def blur_value(self,value):
		""" This function will take value from the slider
			for the blur from 0 to 99 """
		try:
			self.blur_value_now = value
			self.update()
		except Exception as e:
			print(e)
			pass

	def lipStick_value(self,value):
		"""  This function will take the RGB color selected from dropdown list
			then update
		"""
		try:
			self.lipstick_RGB = RGB_dict[value]
			self.color_selected_text = str(value)
			self.update()
		except Exception as e:
			print(e)
			pass


	def changeLipstick(self,img,value):
		""" This funciton will take img image and lipstick color RGB
			Out the image with a changed lip color of the image
		"""

		img = cv2.resize(img,(0,0),None,1,1)
		imgOriginal = img.copy()
		imgColorLips=imgOriginal
		imgGray = cv2.cvtColor(img, cv2.COLOR_BGR2GRAY)
		faces = detector(imgGray)

		for face in faces:
			x1,y1 = face.left(),face.top()
			x2,y2 = face.right(),face.bottom()

			facial_landmarks = predictor(imgGray,face)
			points =[]
			for i in range(68):
				x = facial_landmarks.part(i).x
				y = facial_landmarks.part(i).y
				points.append([x,y])


			points = np.array(points)
			imgLips = self.getMaskOfLips(img,points[48:61])

			imgColorLips = np.zeros_like(imgLips)

			imgColorLips[:] =value[2],value[1],value[0]
			imgColorLips = cv2.bitwise_and(imgLips,imgColorLips)

			value = self.blur_value_now
			value=value//10
			if value%2==0:
				value+=1
			kernel_size = (6+value,6+value) # +1 is to avoid 0

			weight = self.brightness_value_now
			weight = 0.4 + (weight)/400
			imgColorLips = cv2.GaussianBlur(imgColorLips,kernel_size,10)
			imgColorLips = cv2.addWeighted(imgOriginal,1,imgColorLips,weight,0)


		return imgColorLips

	def getMaskOfLips(self,img,points):
		""" This function will input the lips points and the image
			It will return the mask of lips region containing white pixels
		"""
		mask = np.zeros_like(img)
		mask = cv2.fillPoly(mask,[points],(255,255,255))
		return mask

	def update(self):
		""" This function will update the photo according to the
			current values of lipstick color, blur , brightness and set it to photo label.
		"""
		img = self.changeLipstick(self.image,self.lipstick_RGB)
		self.setPhoto(img)

	def savePhoto(self):
		""" This function will save the image"""
		rgb=self.lipstick_RGB
		image = self.tmp
		text  =  self.color_selected_text
		image = ps.putBText(image,text,text_offset_x=10,text_offset_y=10,font_scale=0.6,background_RGB=rgb,text_RGB=(255,255,255))
		filename = 'Snapshot '+str(time.strftime("%Y-%b-%d at %H.%M.%S %p"))+'.png'
		cv2.imwrite(filename,image)
		print('Image saved as:',filename)


	def retranslateUi(self, MainWindow):
		_translate = QtCore.QCoreApplication.translate
		MainWindow.setWindowTitle(_translate("MainWindow", "PyShine video process"))
		self.pushButton_2.setText(_translate("MainWindow", "Start"))
		self.label_2.setText(_translate("MainWindow", "Brightness"))
		self.label_3.setText(_translate("MainWindow", "Blur"))
		self.pushButton.setText(_translate("MainWindow", "Take picture"))
		self.pushButton_3.setText(_translate("MainWindow", "Color"))

## # Subscribe to PyShine Youtube channel for more detail!

## # WEBSITE: www.pyshine.com


if __name__ == "__main__":
	import sys
	app = QtWidgets.QApplication(sys.argv)
	MainWindow = QtWidgets.QMainWindow()
	ui = Ui_MainWindow()
	ui.setupUi(MainWindow)
	MainWindow.show()
	sys.exit(app.exec_())
Thats all for today. In the next tutorial we will make Rock Paper Scissors Application in PyQt5 using Keras library. Have a nice day! Enjoyed this post? Never miss out on future posts by following us