Hi friends, hope you are doing great! Today’s tutorial is about using Flask, Socket.io and JavaScript, to obtain frames from a client’s camera, then process it at the server side and then send the output to the client. This approach enables online services especially from the deployment point of view. Clients can use deep learning-based services from a webserver. Before proceeding to the tutorial please note that these days such approach is seldom used to avoid longer network latencies. In most applications the camera of a client (smart phone) is used to obtain the frames. Thanks to the compact yet powerful computing resources at the client devices the frames are also processed at the client side to provide extremely low latency. A simple example is an app where a user face is replaced by a funny cartoon on a smart phone.
However, there are still some areas that require processing only at the server side, and where latency is not a major concern. One of such cases is where a server side processing is cost consuming and the client have to pay for the services of the server. e.g., sending a client face to tryon glasses or facial recognition from a huge data base, etc.
Alright, let’s proceed with the basic plan of this tutorial. At client side it will use the method named MediaDevices.getUserMedia(). It prompts the user for permission to use a media input which produces a MediaStream with tracks containing the requested types of media. That stream can include, for example, a video track (produced by either a hardware or virtual video source such as a camera, video recording device, screen sharing service, and so forth), an audio track (similarly, produced by a physical or virtual audio source like a microphone, A/D converter, or the like), and possibly other track types. It returns a Promise that resolves to a MediaStream object. If the user denies permission, or matching media is not available, then the promise is rejected with NotAllowedError or NotFoundError respectively. Next, we will use Socket.io, which enables real-time, bidirectional and event-based communication. It works on every platform, browser or device, focusing equally on reliability and speed. We will keep the frame rate at 6 FPS but you can try various values and note the variations in latencies.
Important installation steps to aviod any issues
We need to install the proper working version of Werkzeug i.e. (Werkzeug-0.10.2.dev0dev-20220510) . In addition install the following versions
pip3 install Flask-SocketIO==4.3.1
pip3 install python-engineio==3.13.2
pip3 install python-socketio==4.6.0
pip3 install git+https://github.com/untitaker/werkzeug.git@reloader-perf
Please note that the above installations will resolve following issues:
- ImportError: cannot import name ‘run_with_reloader’ from ‘werkzeug.serving’
- The client is using an unsupported version of the Socket.IO or Engine.IO protocols (further occurrences of this error will be logged with level INFO)
- “GET /socket.io/?EIO=3&transport=polling&t=O2j_BJX HTTP/1.1” 400
We will use socket.emit('image', data); to send the image frame as data to server, and then after processing this data at server we will get the response at the client side using socket.on('response_back', function(image){photo.setAttribute('src', image );});.
At the server side we will run a Flask based App which will use Dlib library to obtain 68 feature points of a face and then replace the lips color as the output image. It is highly recommend to follow these two links before proceeding:
- https://pyshine.com/How-to-make-a-lipstick-tryon-app-in-PyQt5/
- https://pyshine.com/How-to-quickly-deploy-flask-application-for-video/
In a project folder we require following files:
- process.py
- shape_predictor_68_face_landmarks.dat: can be downloaded by following description in above link.
- templates/index.html
- ngrok: can be downloaded from https://ngrok.com/download for port forwarding, so that your localhost (or server address) is availble to the public on the internet.
index.html
<!DOCTYPE html>
<html lang="en">
<head>
    <meta charset="UTF-8">
    <title>Title</title>

    <style>
    	#video {
    		transform: rotateY(180deg);
    		-webkit-transform:rotateY(180deg); /* Safari and Chrome */
    		-moz-transform:rotateY(180deg); /* Firefox */

    	}
    </style>

     <script src="https://ajax.googleapis.com/ajax/libs/jquery/3.5.1/jquery.min.js"></script>
     <script src='https://cdnjs.cloudflare.com/ajax/libs/socket.io/2.0.0/socket.io.js'></script>
</head>

<body>

    <div id="container">
    <video autoplay playsinline id="videoElement"></video>
    <canvas id="canvas"  width="400" height="300"></canvas>
    </div>

    <div class = 'video'>
        <img id="photo"  width="400"  height="300">
        <h1>video</h1>
    </div>

    <script type="text/javascript" charset="utf-8">

        var socket = io.connect(window.location.protocol + '//' + document.domain + ':' + location.port);
        socket.on('connect', function(){
            console.log("Connected...!", socket.connected)
        });


        var canvas = document.getElementById('canvas');
        var context = canvas.getContext('2d');
        const video = document.querySelector("#videoElement");

        video.width = 400;
        video.height = 300;


        if (navigator.mediaDevices.getUserMedia) {
            navigator.mediaDevices.getUserMedia({ video: true })
            .then(function (stream) {
                video.srcObject = stream;
                video.play();
            })
            .catch(function (err0r) {

            });
        }

        const FPS = 6;
        setInterval(() => {
            width=video.width;
            height=video.height;
            context.drawImage(video, 0, 0, width , height );
            var data = canvas.toDataURL('image/jpeg', 0.5);
            context.clearRect(0, 0, width,height );
            socket.emit('image', data);
        }, 1000/FPS);

        socket.on('response_back', function(image){
                photo.setAttribute('src', image );

        });

    </script>


 </body>

</html>
process.py
from flask import Flask, render_template
from flask_socketio import SocketIO, emit
import time
import io
from PIL import Image
import base64,cv2
import numpy as np
import pyshine as ps
from flask_cors import CORS,cross_origin
import imutils
import dlib
from engineio.payload import Payload

detector = dlib.get_frontal_face_detector()
predictor = dlib.shape_predictor("shape_predictor_68_face_landmarks.dat")
Payload.max_decode_packets = 2048

app = Flask(__name__)
socketio = SocketIO(app,cors_allowed_origins='*' )


@app.route('/', methods=['POST', 'GET'])

def index():
    return render_template('index.html')


def readb64(base64_string):
    idx = base64_string.find('base64,')
    base64_string  = base64_string[idx+7:]

    sbuf = io.BytesIO()

    sbuf.write(base64.b64decode(base64_string, ' /'))
    pimg = Image.open(sbuf)


    return cv2.cvtColor(np.array(pimg), cv2.COLOR_RGB2BGR)

def moving_average(x):
    return np.mean(x)


@socketio.on('catch-frame')
def catch_frame(data):

    emit('response_back', data)


global fps,prev_recv_time,cnt,fps_array
fps=30
prev_recv_time = 0
cnt=0
fps_array=[0]

@socketio.on('image')
def image(data_image):
    global fps,cnt, prev_recv_time,fps_array
    recv_time = time.time()
    text  =  'FPS: '+str(fps)
    frame = (readb64(data_image))

    frame = changeLipstick(frame,[255,0,0])
    frame = ps.putBText(frame,text,text_offset_x=20,text_offset_y=30,vspace=20,hspace=10, font_scale=1.0,background_RGB=(10,20,222),text_RGB=(255,255,255))
    imgencode = cv2.imencode('.jpeg', frame,[cv2.IMWRITE_JPEG_QUALITY,40])[1]

    ## base64 encode
    stringData = base64.b64encode(imgencode).decode('utf-8')
    b64_src = 'data:image/jpeg;base64,'
    stringData = b64_src + stringData

    ## emit the frame back
    emit('response_back', stringData)

    fps = 1/(recv_time - prev_recv_time)
    fps_array.append(fps)
    fps = round(moving_average(np.array(fps_array)),1)
    prev_recv_time = recv_time
    #print(fps_array)
    cnt+=1
    if cnt==30:
        fps_array=[fps]
        cnt=0


def getMaskOfLips(img,points):
    """ This function will input the lips points and the image
        It will return the mask of lips region containing white pixels
    """
    mask = np.zeros_like(img)
    mask = cv2.fillPoly(mask,[points],(255,255,255))
    return mask


def changeLipstick(img,value):
    """ This funciton will take img image and lipstick color RGB
        Out the image with a changed lip color of the image
    """

    img = cv2.resize(img,(0,0),None,1,1)
    imgOriginal = img.copy()
    imgColorLips=imgOriginal
    imgGray = cv2.cvtColor(img, cv2.COLOR_BGR2GRAY)
    faces = detector(imgGray)

    for face in faces:
        x1,y1 = face.left(),face.top()
        x2,y2 = face.right(),face.bottom()

        facial_landmarks = predictor(imgGray,face)
        points =[]
        for i in range(68):
            x = facial_landmarks.part(i).x
            y = facial_landmarks.part(i).y
            points.append([x,y])


        points = np.array(points)
        imgLips = getMaskOfLips(img,points[48:61])

        imgColorLips = np.zeros_like(imgLips)

        imgColorLips[:] =value[2],value[1],value[0]
        imgColorLips = cv2.bitwise_and(imgLips,imgColorLips)

        value = 1
        value=value//10
        if value%2==0:
            value+=1
        kernel_size = (6+value,6+value) # +1 is to avoid 0

        weight = 1
        weight = 0.4 + (weight)/400
        imgColorLips = cv2.GaussianBlur(imgColorLips,kernel_size,10)
        imgColorLips = cv2.addWeighted(imgOriginal,1,imgColorLips,weight,0)


    return imgColorLips


if __name__ == '__main__':
    socketio.run(app,port=9990 ,debug=True)
From the main project folder execute this command:
python3 process.py
Once the app gets running you will see this wsgi starting up on http://127.0.0.1:9990
That’s the time when we need to open up another terminal window from the main project folder and run ngrok as:
./ngrok http 9990
Here 9990 is the port we have given at the server app. Once ngrok is running, you will see the something like the following output:
ngrok by @inconshreveable                                    (Ctrl+C to quit)

Session Status                online
Session Expires               1 hour, 59 minutes
Update                        update available (version 2.3.40, Ctrl-U to upd
Version                       2.3.35
Region                        United States (us)
Web Interface                 http://127.0.0.1:4040
Forwarding                    http://8706ac67c71b.ngrok.io -> http://localhos
Forwarding                    https://8706ac67c71b.ngrok.io -> http://localho

Connections                   ttl     opn     rt1     rt5     p50     p90
                              1       2       0.01    0.00    9.15    9.15

HTTP Requests
-------------

POST /socket.io/               200 OK
GET  /socket.io/               200 OK
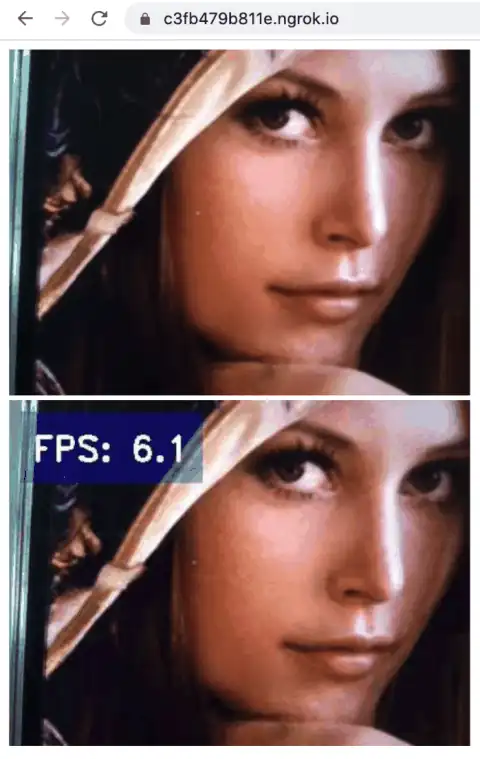
It has forwarded the localhost with a temporary public address, which means your localhost is now accessible anywhere on the internet. Now we need to copy the Enjoyed this post? Never miss out on future posts by following us https link as https://8706ac67c71b.ngrok.io and paste in the client browser for example Safari. You will observe lips colors are changed in the output that is shown near the input live stream at the client side. 
