Learn the Linux Command Line in a Single Post: Complete Tutorial From Files and Processes to Permissions and Networking
The Linux command line is the most powerful interface humans have ever built for a computer. A single pipeline can do in one line what a GUI app does in twenty clicks, and the same commands work on every Linux server, every Mac, every Docker container, and every WSL install on earth. This single post teaches the whole CLI in five stages, with runnable snippets and five diagrams.
Learning Roadmap
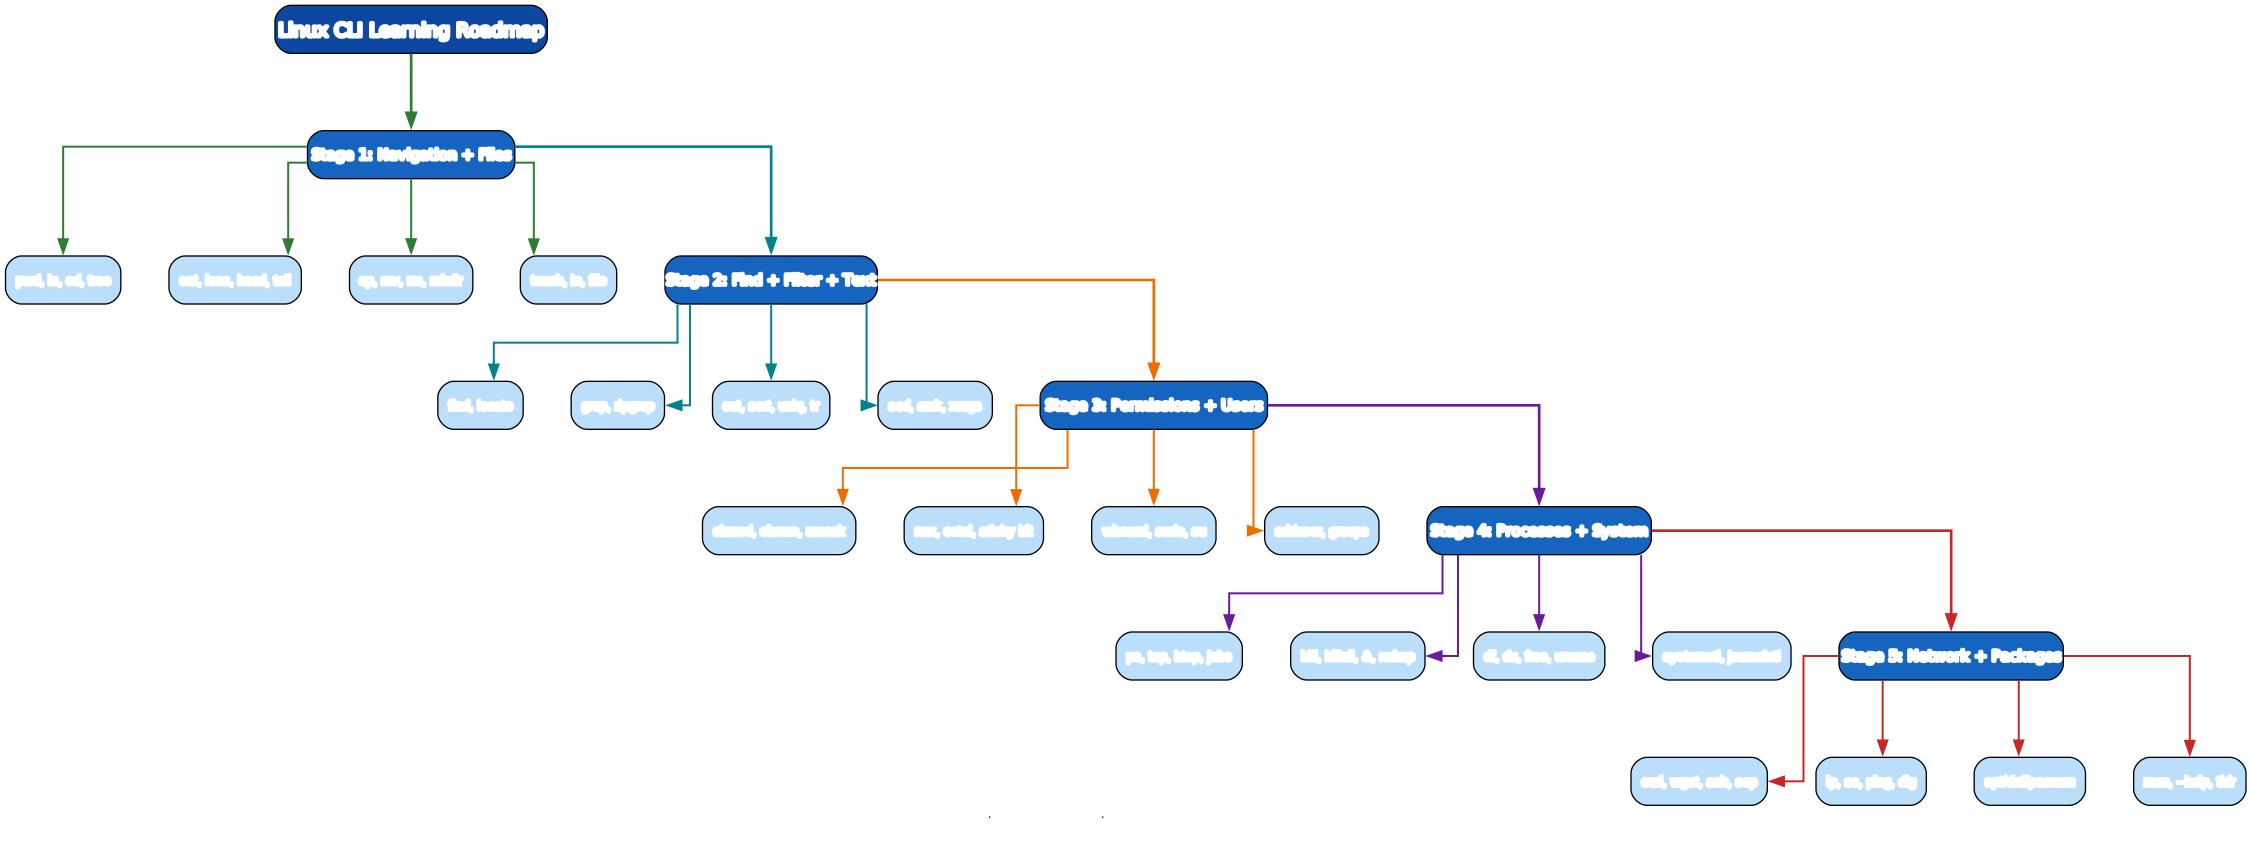
The roadmap moves from moving around the filesystem (Stage 1), to finding and transforming text (Stage 2), to who-can-do-what (Stage 3), to what’s-running (Stage 4), to networking and installing software (Stage 5).
Stage 1 — Navigation + Files
Where am I and what’s here?
pwd                  # print working directory (where am I?)
ls                   # list current dir
ls -la               # l=long listing, a=all (incl. dotfiles)
ls -lah              # h=human-readable sizes
ls -lt               # sort by modification time (newest first)
cd /etc              # change to an absolute path
cd ..                # up one directory
cd ~                 # home directory (~ = $HOME)
cd -                 # back to the previous directory
tree                 # recursive directory view (apt install tree)
tree -L 2            # limit depth to 2
Viewing file contents
cat file.txt                 # dump the whole file
less file.txt                # pager: page with space, q to quit, / to search
head -n 20 file.txt          # first 20 lines
tail -n 20 file.txt           # last 20 lines
tail -f /var/log/app.log      # follow: stream new lines as they're written (live logs)
wc -l file.txt                # count lines
wc -w file.txt                # count words
less is your friend — space pages down, b pages back, /pattern searches, n/N next/previous match, q quits. Most commands that produce long output pipe into less: ls -la | less.
Copying, moving, deleting
cp file.txt backup.txt            # copy
cp -r dir/ backup_dir/            # -r recursive (for directories)
mv old.txt new.txt                # move / rename (same filesystem = instant)
rm file.txt                       # remove (NO recycle bin!)
rm -r dir/                        # recursive delete a directory
rm -rf dir/                       # -f force, no prompt (DANGER)
mkdir newdir                      # make directory
mkdir -p path/to/nested/dir       # -p create parent dirs as needed
touch file.txt                    # create empty file / update timestamps
ln -s target linkname             # symbolic link (symlink)
Pitfall:
rm -rfis irreversible and unscoped. Always check the path first —ls path/beforerm -rf path/. A famous typorm -rf / $var(note the space) erased entire systems. Quote variables and double-check the argument.
File inspection
file image.png                    # tells you the file type (not just extension)
stat file.txt                     # detailed metadata: size, times, inode
du -sh dir/                        # total size of a directory (human-readable)
du -sh * | sort -rh | head         # biggest items in current dir

Stage 2 — Find + Filter + Text Processing
The Unix pipeline
The defining idea of the CLI is the pipeline: feed one command’s output into the next, with no temp files:

# top 10 most frequent ERROR sources in a log
cat access.log | grep ERROR | awk '{print $4}' | sort | uniq -c | sort -rn | head -10
Each stage reads stdin and writes stdout; the | connects them. The same idea scales to gigabytes of data because each stage streams line by line.
find
find . -name '*.py'                       # by name
find . -type f -mtime -7                  # files modified in last 7 days
find . -type d -name '__pycache__'        # directories named __pycache__
find . -size +100M                         # files larger than 100 MB
find . -name '*.bak' -delete               # find AND delete (be careful)
find . -name '*.py' -exec wc -l {} +       # run a command on each match
-exec ... {} + collects matches into batches (fast); -exec ... {} \; runs the command once per match. For deletion, find ... -delete is safer than piping to xargs rm.
grep and ripgrep
grep 'ERROR' app.log                      # lines containing ERROR
grep -i 'error' app.log                   # case-insensitive
grep -n 'ERROR' app.log                   # line numbers
grep -rn 'TODO' . --include='*.py'        # recursive, only .py files
grep -v 'DEBUG' app.log                   # invert: lines WITHOUT DEBUG
grep -E '\b\d{3}\b' data.txt              # extended regex (ERE)
grep -c 'ERROR' app.log                   # count matching lines

rg 'TODO'                                  # ripgrep: faster, respects .gitignore
rg -i 'error' -t py                        # only Python files
rg --pcre2 '(?<=\$)\d+'                    # PCRE2 for lookarounds
ripgrep (rg) is a modern grep replacement — dramatically faster, with sensible defaults (ignores hidden and git-ignored files, colorizes output).
Text processing toolkit
# cut: extract columns
cut -d, -f1,3 data.csv              # comma-delimited, fields 1 and 3
cut -c1-10 file.txt                 # characters 1-10 of each line

# sort + uniq: frequency counts
sort names.txt | uniq -c | sort -rn | head      # most common names

# tr: translate / delete characters
echo "Hello" | tr 'a-z' 'A-Z'        # HELLO (uppercase)
tr -d ' \t' < file.txt               # delete spaces and tabs

# paste + column: side-by-side and aligned
paste a.txt b.txt                    # line-by-line side by side
column -t -s, data.csv               # pretty-print CSV as columns

# sed: stream editor (substitute, delete)
sed 's/foo/bar/g' file.txt           # replace all foo with bar
sed -i 's/foo/bar/g' file.txt        # -i in-place edit (back up first!)
sed '/^$/d' file.txt                  # delete blank lines

# awk: column-oriented text processing
awk -F, '{print $2}' data.csv        # 2nd comma-delimited column
awk '{sum += $1} END {print sum}' nums.txt   # sum first column
awk '$3 > 100' sales.txt             # rows where 3rd column > 100
xargs: stdin to arguments
# turn a list of filenames into rm arguments
find . -name '*.bak' -print0 | xargs -0 rm -f      # -0 handles spaces safely

# parallel processing
ls *.png | xargs -I{} -P8 convert {} {}.jpg         # 8 concurrent conversions
Pitfall:
find | xargs rmbreaks on filenames with spaces. Use-print0onfindand-0onxargsso they’re separated by NUL, not whitespace.
Stage 3 — Permissions + Users
The permission model
Every file has three permission sets — owner, group, others — each with three bits: read, write, execute.
ls -l file.txt
# -rw-r--r-- 1 alice staff 1234 Jul 13 10:00 file.txt
#  ^^^ ^^^ ^^^
#  owner group others
#  rw-  r--  r--    (owner can read+write, others can only read)
chmod
chmod u+x script.sh          # user (owner) gets execute
chmod g-w file.txt           # group loses write
chmod o=r file.txt           # others get read only
chmod a+r file.txt           # all (a) get read
chmod 755 script.sh          # octal: rwxr-xr-x (owner all, others r-x)
chmod 644 file.txt           # octal: rw-r--r-- (typical file)
chmod 600 .ssh/id_rsa        # octal: rw------- (private key)
Octal cheat sheet (each digit = owner, group, others):
7= rwx (4+2+1),6= rw- (4+2),5= r-x (4+1),4= r–,0= —
Common modes: 755 directories, 644 files, 600 secrets, 700 private dirs.
chown and umask
sudo chown alice file.txt          # change owner
sudo chown alice:staff file.txt    # owner:group
umask 022                          # new files get 644, dirs 755 (default)
umask 077                          # new files get 600, dirs 700 (private)
Users, sudo, groups
whoami                             # current user
id                                 # uid, gid, and groups
groups                             # groups you belong to
sudo command                       # run as root (you'll be prompted for password)
sudo -i                            # start a root shell
su - otheruser                     # switch to another user (asks their password)

# user management (need root)
sudo adduser bob                   # create user (Debian/Ubuntu)
sudo usermod -aG docker bob        # add bob to docker group (log out/in to take effect)
sudo deluser bob                   # remove user
Special permission bits
chmod +t dir/                      # sticky bit on a dir: only owner can delete their files (/tmp uses this)
chmod +s script.sh                 # setuid: runs as file owner (security-sensitive!)
chmod g+s dir/                     # setgid on dir: new files inherit the dir's group
Pitfall:
setuidon a script is a security hole on most systems — the kernel ignores setuid on scripts. Use it only on compiled binaries you understand (likesudo,passwd). Neverchmod 777a file — it means anyone can modify it, which on a multi-user system (or a container with other services) is a wide-open door.
Stage 4 — Processes + System
Seeing what’s running
ps aux                             # all processes (a=all, u=user format, x=no tty)
ps aux | grep nginx                # find nginx processes
top                                # live, full-screen process monitor (q to quit)
htop                               # nicer top (apt install htop), F6 to sort, kill with F9
jobs                               # background jobs in this shell
pgrep -fl python                   # find PIDs by name (-f full cmd, -l show name)
Controlling processes
sleep 300 &                        # run in background (&)
nohup ./server &                   # keep running after you log out (no hangup)
disown -h %1                       # detach a job from the shell so it survives logout
ctrl-z                             # suspend the foreground process
bg                                 # resume the suspended job in background
fg                                 # bring the background job to foreground
kill 12345                         # send SIGTERM (graceful) to PID 12345
kill -9 12345                      # send SIGKILL (force, no cleanup) — last resort
killall nginx                      # by name
pkill -f 'python server.py'        # by full command line
Pitfall:
kill -9(SIGKILL) can’t be caught — the process gets no chance to clean up (flush buffers, close sockets, write state). Trykill(SIGTERM) first and wait. Use-9only when a process is truly stuck.
systemd services
sudo systemctl start nginx         # start a service
sudo systemctl stop nginx
sudo systemctl restart nginx
sudo systemctl reload nginx         # reload config without restarting
sudo systemctl status nginx         # is it running? recent logs?
sudo systemctl enable nginx         # start on boot
sudo systemctl disable nginx        # don't start on boot

journalctl -u nginx                # all logs for the nginx unit
journalctl -u nginx -f              # follow (live)
journalctl -u nginx --since today
journalctl -p err                   # only errors
System inspection
df -h                              # disk free per filesystem (human-readable)
du -sh /var/log                    # size of a directory
free -h                            # memory usage (human-readable)
uname -a                           # kernel + OS info
lscpu                              # CPU details
uptime                             # load average + how long up
lsblk                              # block devices (disks, partitions)
mount                              # what's mounted where
dmesg | tail                       # kernel ring buffer (recent hardware msgs)
Stage 5 — Network + Packages
Network tools
# HTTP
curl https://api.example.com                         # GET, print body
curl -s -o file.json https://api.example.com/data     # silent, save to file
curl -X POST -d '{"k":"v"}' -H 'Content-Type: application/json' https://api.example.com
curl -I https://example.com                          # headers only

# download
wget https://example.com/bigfile.zip
wget -c https://example.com/bigfile.zip               # -c resume partial download

# remote shells + file copy
ssh user@host                          # log in
ssh user@host 'command'                # run one command remotely
scp file.txt user@host:/tmp/          # copy to remote
scp user@host:/var/log/app.log .       # copy from remote
rsync -avz --progress src/ user@host:dst/   # efficient sync (only diffs)

# inspect the network
ip addr                                # interfaces + IPs (modern)
ip route                               # routing table
ss -tlnp                               # listening TCP ports + owning process (modern netstat)
ping example.com                       # is the host up?
dig example.com                        # DNS lookup
dig +short example.com                 # just the answer
nc -zv host 80                         # is port 80 open? (netcat port-scan)
tcpdump -i eth0 port 80                # capture packets on port 80 (needs root)
Package managers
# Debian / Ubuntu
sudo apt update                        # refresh package index
sudo apt install nginx                 # install
sudo apt upgrade                       # upgrade all packages
sudo apt remove nginx                  # remove
apt search keyword                     # search
apt show nginx                         # package details

# Fedora / RHEL / CentOS
sudo dnf install nginx                 # (yum on older systems)

# Arch
sudo pacman -S nginx

# Alpine (often inside Docker)
apk add --no-cache nginx
Getting help
man ls                                 # the full manual page (q to quit)
man 5 crontab                          # section 5 (file formats); 1=cmds, 2=syscalls, 3=libs
ls --help                              # quick built-in help
tldr ls                                # community examples (apt install tldr)
command --help | less                  # page long help output
Pitfall:
manpages are authoritative but dense.tldr(community-maintained, examples-first) is faster for “how do I actually use this?”. Install both:sudo apt install tldr, thentldr tarbeats readingman tarfor everyday use.
The filesystem hierarchy

Knowing where things live is half the battle:
| Path | Contents |
|---|---|
/bin, /usr/bin | User binaries (ls, cat, grep) |
/sbin, /usr/sbin | System binaries (admin, often need root) |
/etc | System-wide config files (hosts, nginx/, ssh/sshd_config) |
/var | Variable data: logs (/var/log), caches, spool, databases |
/home, /root | User home dirs; /root is root’s home |
/tmp | Temporary files (often cleared on reboot — never store anything you need) |
/proc, /sys | Virtual filesystems: kernel/process and hardware info, not real files |
/dev | Device files (sda, null, pts) |
/usr | User programs and libraries (bin, lib, share, local) |
/opt | Optional add-on software |
/mnt, /media | Mount points for external filesystems |
/proc is a goldmine — cat /proc/cpuinfo, cat /proc/meminfo, /proc/<pid>/status give live system info as if they were text files.
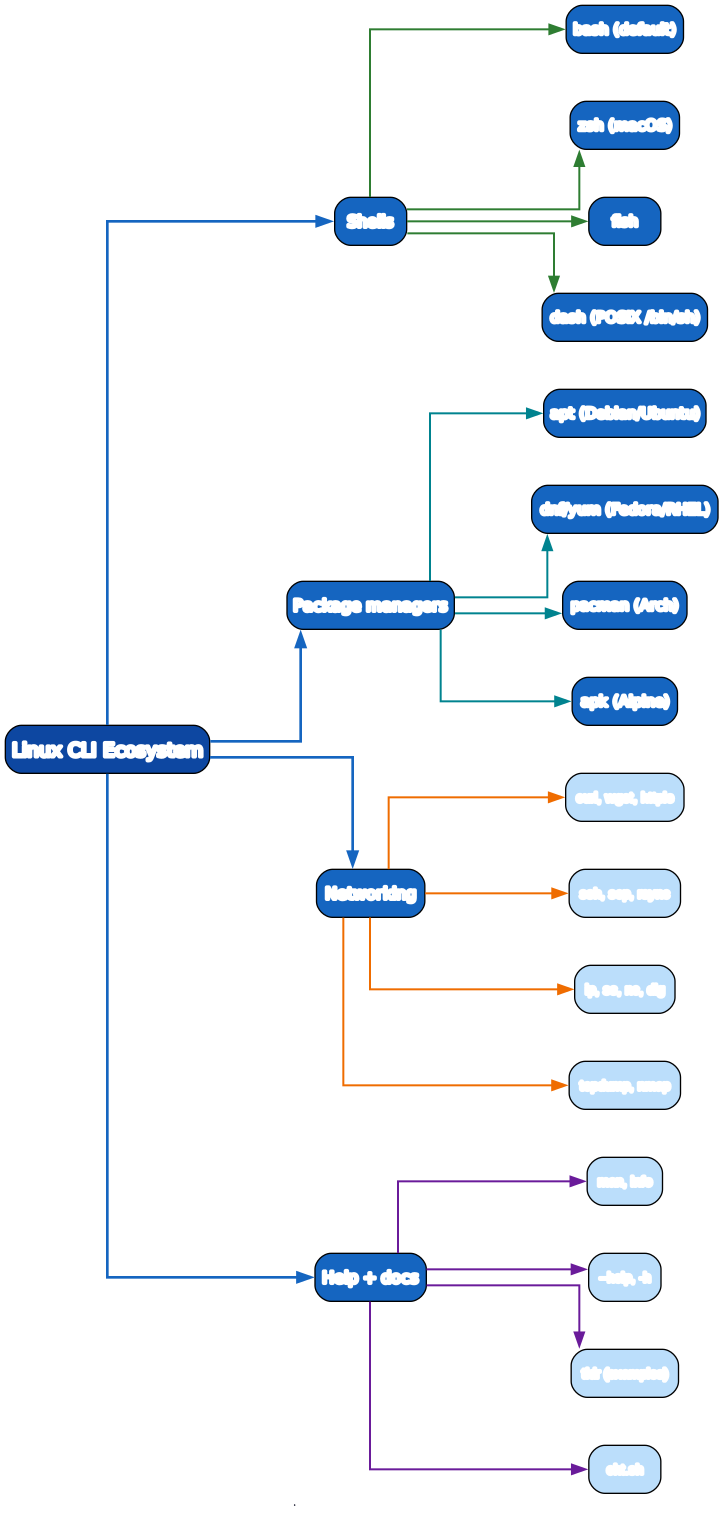
The toolchain ecosystem
Quick-Start Checklist
- Learn 10 navigation/file commands —
pwd ls cd cat less head tail cp mv rm mkdir. That covers ~50% of daily use. - Build a pipeline —
ls -la | grep '.py$' | wc -luntil chaining is natural. - Master
find—find . -name '*.py' -mtime -7is worth memorizing. - Switch to
ripgrep—rgis faster and smarter thangrep. - Learn octal permissions —
755dirs,644files,600secrets. - Use
sudonot root login — audit trail, fewer accidents. - Watch processes —
htopfor live,ps aux | grep Xfor one-off. - Manage services —
systemctl status <svc>andjournalctl -u <svc> -f. - Inspect the network —
ip addr,ss -tlnp,ping,dig. - Install
tldr— examples beat dense man pages for everyday use.
Common Pitfalls
rm -rf path/typos — irreversible.ls path/first; quote variables.find | xargs rmon spaced filenames — use-print0+xargs -0.sed -iwithout a backup — usesed -i.bakso the original is saved.chmod 777— world-writable is almost never right. Use755/644/600.kill -9first — trykill(SIGTERM) so the process can clean up.- Running as root for routine work — use
sudofor the one command, not a root shell. - Storing anything in
/tmp— it’s wiped on reboot. - Not reading
man— when in doubt,man commandortldr command.
Further Reading
- The Linux Command Line (William Shotts) — free full book
- The Art of the Command Line (jlevy) — curated master list
- explainshell.com — paste a command, see what each flag does
- tldr pages — community examples for every command
- Linux man pages online — searchable
Related guides
The Linux CLI is the substrate the rest of the stack runs on:
- Learn Bash in One Post: Complete Tutorial — the shell that runs these commands; scripting, variables, functions, robust scripts.
- Learn Regex in One Post: Complete Tutorial —
grep,sed, andawkall speak regex. - Learn Git in One Post: Complete Tutorial — version control runs entirely on the CLI.
- Learn Docker in One Post: Complete Tutorial — containers are Linux processes and namespaces; the CLI concepts transfer directly.
- Learn SQL in One Post: Complete Tutorial — pipe
curl | jqoutput into a local SQLite/Postgres database.
The Linux CLI rewards depth. The five stages here cover ~95% of daily work, and the remaining 5% ( Enjoyed this post? Never miss out on future posts by following us cron, iptables, strace, lsof, nc tricks) is where you graduate from “I can use the terminal” to “I can debug anything on a Linux box.” The single most valuable habit is to prefer the pipeline over temp files — read one stream, transform it, pass it on. That habit, more than any individual command, is what makes a command-line user fast. Run every snippet above against a real Linux box (or WSL, or a Docker ubuntu container); the terminal is learned by doing, not by reading. 


